I’m sharing a portrait I’ve created and the various stages I go through to complete this style of portraiture. I hope you enjoy it.
This portrait is done with a limited palette of Transparent Earth Red, Viridian, Dioxazine Purple and Titanium White until the last few steps.
I also used only two brushes through the whole process: a number 8 flat hog hair brush and a number 3 flat filbert hog hair brush. This keeps me loose, organized and gives a little bit of consistency to the style. It also forces me to be more creative with my brushwork so that the piece doesn’t get too static and boring.
I work very, very dry with this style until quite late into the portrait where I get a bit more heavy with the colour. This allows me the freedom to make major changes without getting muddy.
The finished piece:

Creating this style came out of a desire to challenge myself on an artistic level and remove myself from a over-painted look. In creating this new method I found it to be a perfect way to introduce portrait concepts to students and accomplished painters looking to loosen up their style.
Step 1: Basic Layout
I do not have a picture for step one. What I do for step 1 is to do a very loose sketch of the general oval shape of her forehead, create a vertical centre line and create a horizontal centre line approximately where the eyes should sit. This is very quick and gestural.
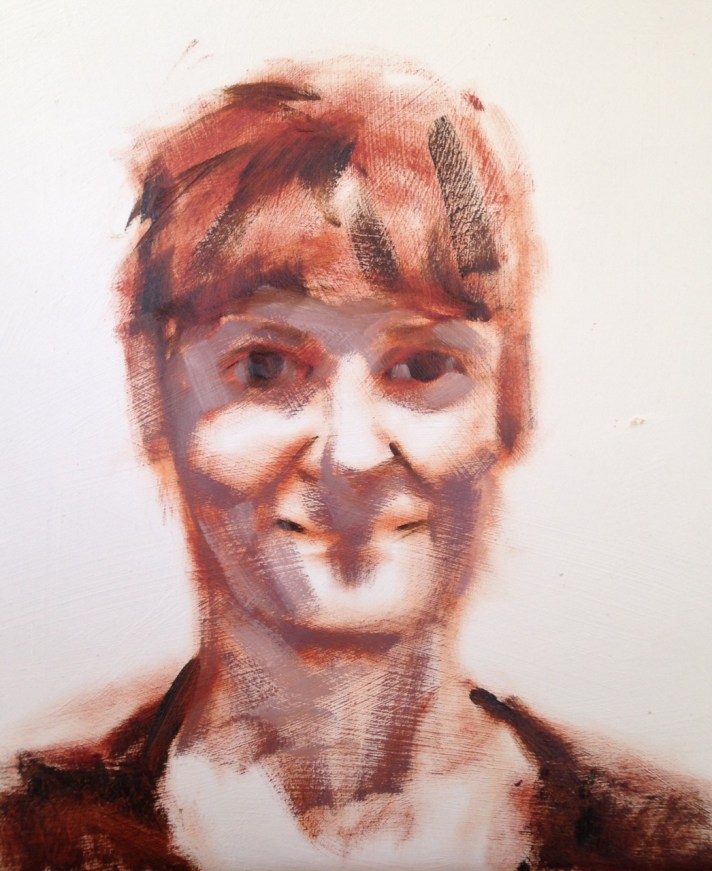
Step 2: Tonal Study
With a very dry brush I do a loose sketch just looking for broad shapes. I start of light and stumble the colour until I get darker areas. I do not create any detail here at all. I am working with Transparent Earth Red (Gamblin).

Step 2: Adding Depth
By mixing Viridian and Transparent Earth Red I create the dark values that have a cooler tone than just Transparent Earth Red on it’s own. This part of the portrait lets me know where the weight of the painting will sit and it allows me to plan to better compose the upcoming colours.

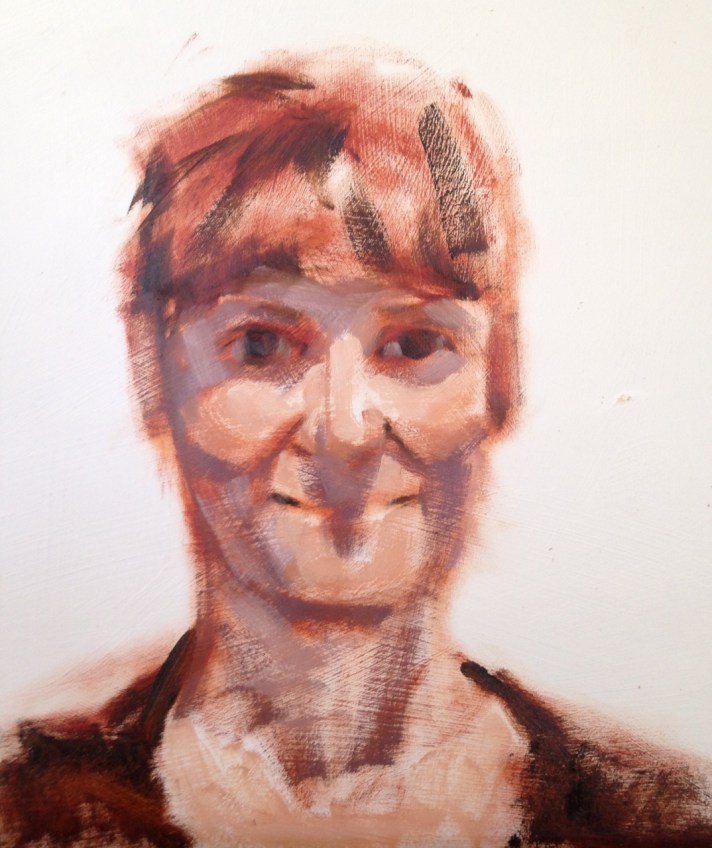
Step 3: Creating Cools
With Dioxazine Purple, Titanium White and a bit of Transparent Earth Red I create the shadow areas of the face. I am still keeping my brush quite dry. The dry brush technique allows for undercolours to poke through and enhances luminosity of the final piece.
Step 4: Creating Warmth
With Transparent Earth Red mixed with Titanium White I am creating the base skin tones that are in light.
Step 5: Background
This part of the painting is my absolute favourite. I fill in the background with a harmonious colour, usually a fairly neutral colour. I use darks in the background to enhance highlights on the face and lights in the background to enhance the composition and styling of the dark colours. You can really see the individual take their own character with just a few refinements at this stage as well.

Step 6: Midway Adjustments
Notice at step 6 I am still using a very limited palette of Transparent Earth Red, Viridian, Dioxazine Purple with Titanium White. I have went in with my darks and added a bit more information into the eye area and mouth area.

Step 7: Adding More Warmth
In this piece all I have done is added Cadmium Red Light mixed with Titanium White to add character. Her cheeks, chin and a little bit around the eye area have been warmed up with the mixture. On an artistic level this is the point where I’m quite happy with the piece and if I were to keep it for my own purposes I would stop here. However, because this piece is being auctioned off most clients prefer a slightly more ‘finished’ look.
Step 8: Adding a Second Light Source
I have added just a small amount of Quinacridone Rose to the cheeks here to flesh out the transition between shadow and the warmth of the Cadmium Red Light and Titanium White mixture.
I have also delved into the secondary light source here on the right hand side of her face. The photo was taken at a live event and there was a purplish light just highlighting her face. I could have ignored it and it would have been a beautiful piece, but I thought I would accentuate it to create a bit more interest. The colour is a mix of Quinacridone Rose, Dioxazine Purple and Titanium White.

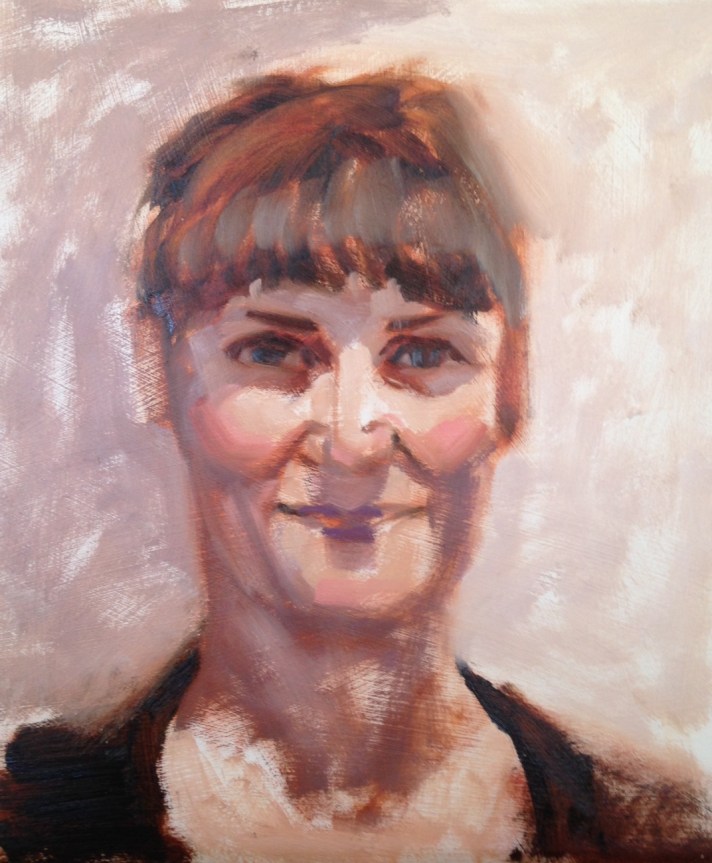
Step 9: Refinement, The Finished Piece
This phase is mostly for refinement of brushwork. I also restate my highlights at this point with a mixture of Permanent Orange and Titanium White. I’ve added the secondary light source to the rest of the portrait (hair, clothing etc). In the brightest part of the secondary light I have created a very light colour of Viridian, Dioxazine Purple and Titanium White.
From this point you could continue to soften brushwork, harden edges and just refine the piece, but I really have a strong preference for ‘brush-y’ loose work and have decided not to over-work the piece.
